Red is a beautiful colour. It’s vibrant and eye-catching! When we take photos in the fall, it’s a bonus if it’s during the “peak,” the period of time when leaves have changed and there are lots of brilliant reds and oranges. The reds seem the first to let go of their branches, leaving the yellows staying the longest, warming up the scenery until, they, too, finally either fade to brown or fall off the trees.
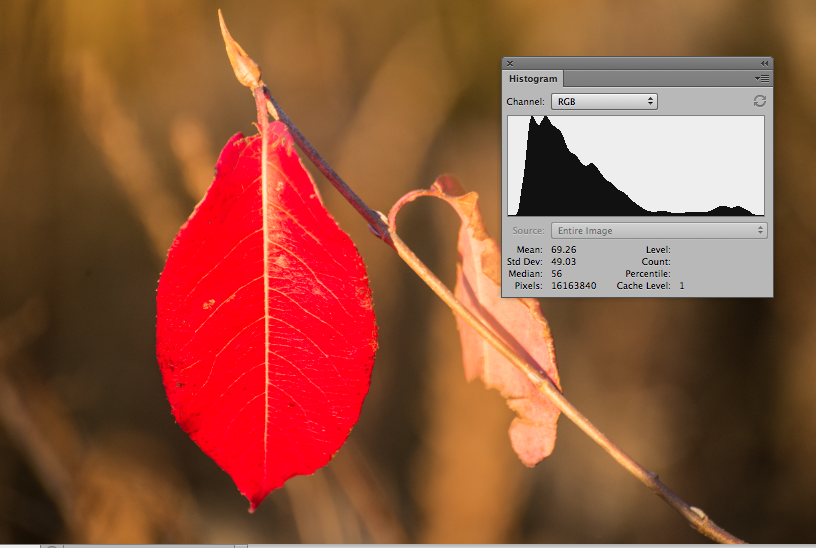
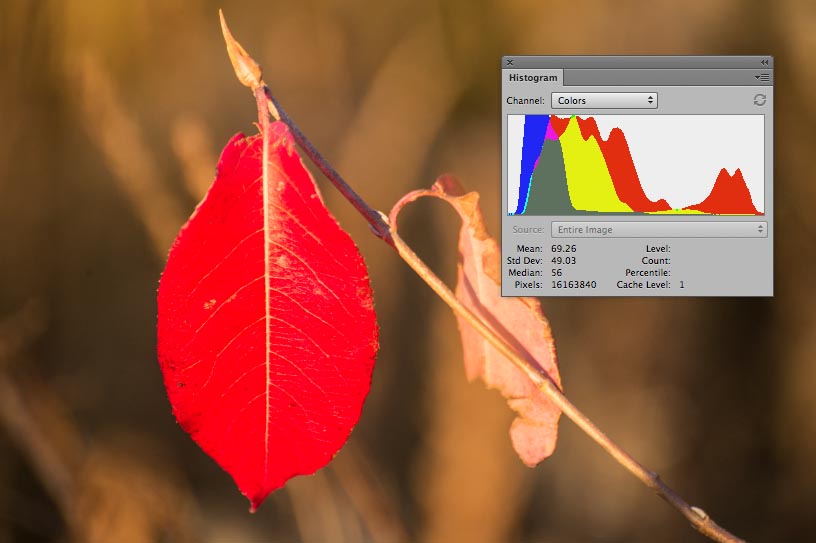
There is, however, something we need to be aware of with reds. The luminance channels of red plants can pack quite a wallop. Many of us with DSLRs will have a histogram preview to give us an idea if our exposure is correct. However, if it is set to an RGB histogram, we may be falsely assured. In the image above, this is quite apparent. If you look at the histogram here, you can see that there is a lot of red in the right part of the histogram and that red graph continues off the graph. That means that we have clipping in the reds, which, simply put, means that we are missing details in the red. If you look at the leaf itself, it’s pretty apparent that detail has been blown out. Easy to view on a computer screen, that is, but this might not be easily apparent if viewing the image on a back of a camera (especially in outdoor light) or if viewing a histogram containing all the channels in one graph.

If I had my camera’s histogram preview set to RGB, this might have been what I saw — nothing to really give an indication that there was a problem with exposure.
Using matrix metering, my camera set the correct exposure for the scene it was looking at. But because the red was so more strongly lit (the background is actually in shade and was much darker than seen here), it brightened up the shadows at the expense of the bright areas. I could have saved myself some effort if I had merely switched to spot metering, to let the camera know that it should only care about the light reading for the brightly lit red leaf. This would have made the background darker and shown more detail in the leaf. Since I shoot in RAW, I was lucky to have enough information in the image to be able to use Adobe Camera Raw to go into the red’s luminance channel and bring back the detail, since I hadn’t metered properly for the leaf. It’s important to note that while post processing can allow us to retrieve some detail in shadows or bright areas that get clipped (run off either side of that histogram graph), there is a limit to the amount of data stored with the image. If too much clipping occurs, there will be no information to recover — so it’s always important to try to get that exposure right in-camera.
The lighting doesn’t have to be this extreme for you to want to take care when shooting red. I first experienced this when shooting a red poppy in a field of green grass, under rather diffuse lighting. The exposure looked great in my histogram readout — at the time, I only looked at the combined RBG histogram — but when I opened the images and viewed on my computer, I saw red blobs in a field of beautifully exposed grass. There was no detail in the flower, so I looked at my colour channels. The histograms of all the colours looked perfect…except that for the red channel. It was off the charts. It was then I realized that red plants might have special needs.
If you have a camera that will allow you an image preview showing each of the RGB channels separately, you would be wise to use it. A problem with any colour channel will be more apparent when viewed individually whereas it might be masked by averaging the channels together by combining in a single graph. A single histogram combining all the channels gives a false sense of security. As well, if you have spot metering, consider using it when wanting to focus on a particular subject. You can measure what the exposure reading is for the red object as compared to the rest of the scene, and depending on what is important to you, that can help you to decide on an exposure. Bracketing if unsure is never an unwise policy.

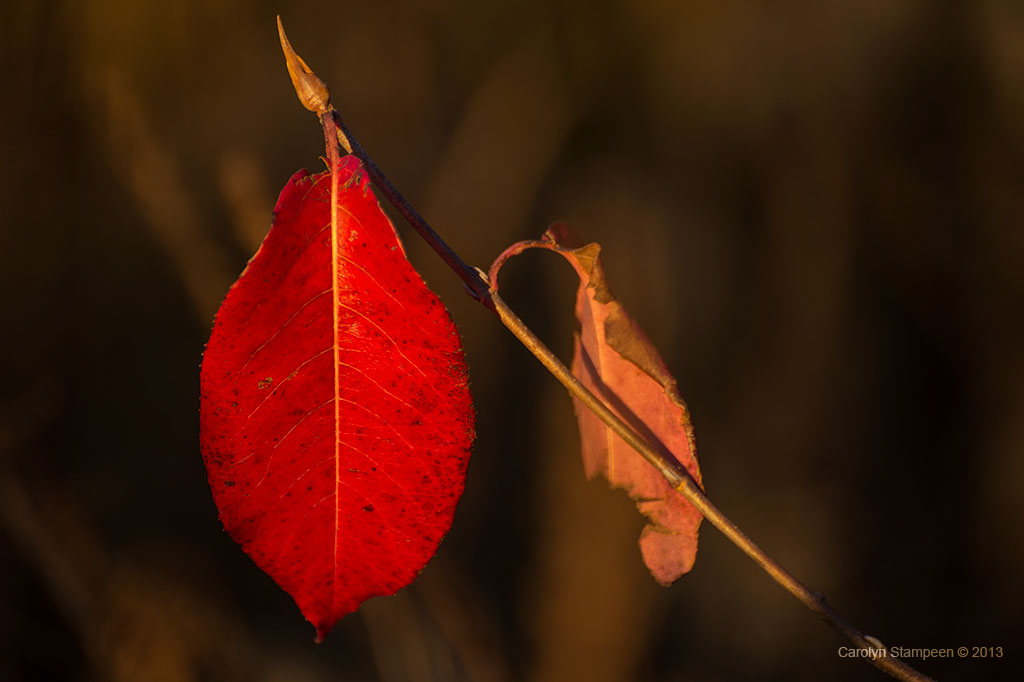
This is my corrected image. I use Photoshop, so when I opened my image with Adobe Camera Raw, I first lowered the exposure to darken the background (which brought some detail back in the red), then I went into the luminance channel for Red, and moved the slider down until I had more detail. Fortunately, my image held enough information to allow for correcting after the fact.

